How to Fix a Slow Tire Leak (Simple Steps Anyone Can Do)
Ever notice your tire losing air little by little and wonder what’s going on? You’re not alone! Slow tire leaks are super common, and according to AAA, roughly 60% of roadside tire issues come from undetected slow leaks. Wow, right?
In this guide, we’re going to break down exactly how to fix a slow tire leak, what causes it, and how to keep it from happening again. I’ll keep things simple, practical, and very real — because no one has time for confusing car jargon. Whether it’s a nail, a bad valve stem, or a pesky wheel bead leak, you’ll learn how to spot it, fix it, and get back on the road safely!
Let’s dive into fixing that slow tire leak once and for all!
What Causes a Slow Tire Leak?

A slow tire leak can sneak up on you. One day your tire looks perfect… and the next day it’s sagging like it’s tired of life. But don’t worry — slow leaks happen for a few common reasons, and once you know what they are, it gets way easier to spot and fix them.
Below, I’ll break down the biggest causes in a simple, real-world way. No fancy car talk. Just stuff you’ll actually understand and use!
Punctures from nails, screws, or road debris
This is the most common reason for a slow leak, and honestly, it happens to the best of us. You can be driving to work, minding your business, and boom — you roll right over a nail. Sometimes the nail stays stuck in the tire, and weirdly, that slows the leak down. Other times, the hole is tiny but still leaks a little air every day.
You usually won’t notice the moment it happens. Most people only realize something’s wrong when the tire pressure light turns on or the tire starts looking a bit low.
A small puncture can still cause a slow but steady loss of air. The leak may come from the tread area, and that’s the easiest spot to repair. Anything in the sidewall, though? That’s not safe to fix — that’s a full tire replacement situation.
Faulty or aging valve stems
Valve stems — those little rubber tubes where you add air — can age and crack over time. The problem is they look fine until you get up close. Rubber breaks down from heat, cold weather, and even normal driving.
If the valve stem is damaged, you might hear a faint hiss when you push it. Sometimes the leak comes from the tiny metal valve core inside the stem. Those can get loose, rusty, or bent.
The signs are simple:
- Your tire loses pressure slowly every few days
- Adding air doesn’t seem to help for long
- The stem looks cracked or dry
The good news is that valve stems are cheap to replace. Most shops can swap them out in minutes.
Bead leaks around the wheel rim
If the air is sneaking out from where the tire meets the rim, that’s called a bead leak. And yeah, it’s as annoying as it sounds.
Bead leaks usually happen because the metal rim has some corrosion or dirt on it. Salt from winter roads, old wheel grime, or even small dents can keep the tire from sealing tightly.
When the weather gets colder, the metal rim can shrink just a bit. That tiny shift makes the leak worse. You might see little bubbles if you spray soapy water along the edge where the tire meets the wheel.
Older wheels are especially guilty of this. If the finish on the rim is peeling or rusty, it’s even more likely.
Tire damage or sidewall issues
Sometimes the slow leak isn’t from a puncture or the rim — it’s actually the tire itself breaking down. Over time, rubber gets weaker. Tiny cracks can form, especially in older tires. This is called “dry rot,” and it makes it easier for air to escape.
Sidewall leaks are serious. If the damage is near the sidewall, you can’t plug or patch it. It’s unsafe because the sidewall flexes a lot while driving. Any repair there could fail, and that could lead to a blowout.
Things to look for:
- Cracks in the rubber
- Bulges or bubbles on the side
- Deep scratches or cuts
- Old tires with fading or dry spots
If you see any of those signs, it’s best to replace the tire. No quick fix can make a worn-out tire safe again.
How to Diagnose a Slow Tire Leak
Trying to figure out why your tire keeps losing air can feel like playing detective. The good news? You don’t need any big tools or auto-shop skills. With a little patience (and maybe some soapy water), you can find the leak yourself. And once you know where the problem is coming from, fixing it becomes way easier!
Let’s walk through the simplest ways to diagnose a slow tire leak.
Visual inspection of tread and sidewalls
The first thing you should always do is give your tire a good look. Sounds basic, but you’d be surprised how many slow leaks are caused by something obvious — like a screw sticking right out of the tread.
Start by checking the tread area. Look closely for:
- Nails
- Screws
- Sharp objects
- Cuts or little slashes
- Pieces of glass
- Anything shiny or weird-looking
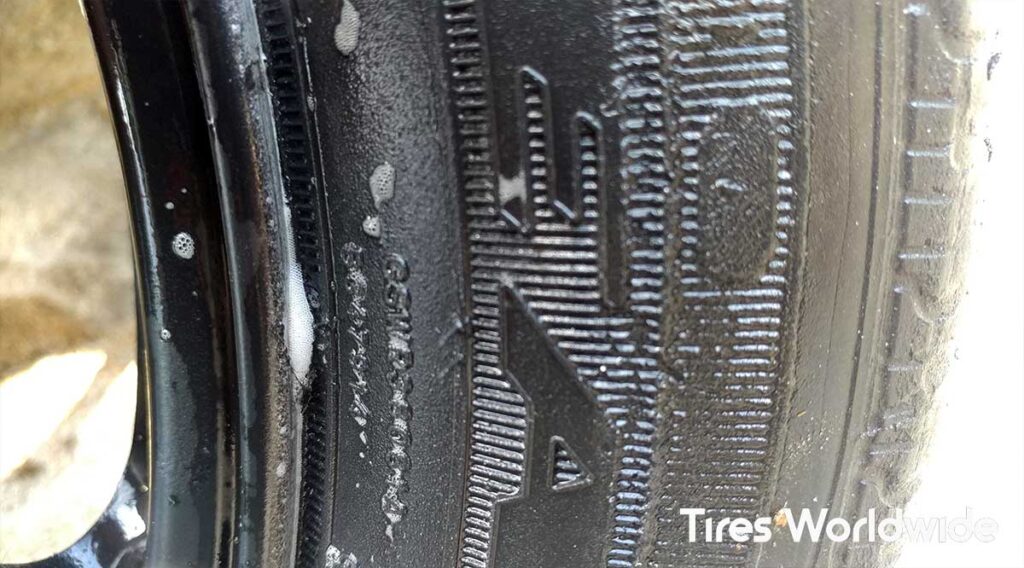
Then check the sidewall. You want to look for cracks, bubbles, or any odd bulges. If the sidewall is damaged, that’s a whole different situation — and usually means the tire needs to be replaced.
The soap-and-water method
This is the classic way to find slow leaks, and honestly, it works great. You don’t need anything fancy — just some dish soap and water.
Mix the soap with water in a spray bottle (or a cup if that’s all you’ve got). Then spray it all over the tire, especially around the tread, the valve stem, and the rim edge.
What you’re looking for is bubbles.
Little bubbles = little leak.
Big bubbles = bigger leak.
It’s super satisfying when you finally spot the bubble action because you know you’ve found the troublemaker.
For a step-by-step walkthrough, AutoZone has a simple guide here:
https://www.autozone.com/diy/tire-wheel/how-to-find-a-slow-leak-in-a-tire
Submerging the tire for leak detection
If you want to feel like a real mechanic, this method works amazingly well — but it’s a bit messy. Some shops dunk the entire tire into a large water tank and watch for bubbles. It’s like searching for a tiny underwater volcano.
Most people don’t have a tank at home, but you can still do a smaller version:
- Use a large bucket, trash can, or even a kid’s pool
- Submerge one part of the tire at a time
- Watch closely for bubbling
This is especially helpful when the leak is super small or hiding somewhere weird.
Checking air pressure for drop patterns
Sometimes the leak is too tiny to see, so you have to track your air pressure over time. Grab a basic tire pressure gauge — even the cheap ones work fine.
Here’s what to do:
- Check the pressure when the tire is cold
- Write the PSI down
- Check again 24 hours later
- Compare the numbers
If the PSI drops by more than 1–2 pounds overnight, you’ve likely got a slow leak. If it drops even faster, then the leak is bigger than you think.
How to Fix a Slow Tire Leak (Step-by-Step)
Alright, so you found the leak — now it’s time to actually fix it. Don’t worry, this part isn’t as scary as it sounds. Most slow leaks can be fixed at home if you’ve got the right tools and a little patience. And even the jobs you can’t do yourself will make way more sense after you see how the process works.
Let’s go through the easiest and most common repair methods so you know exactly what to do next.
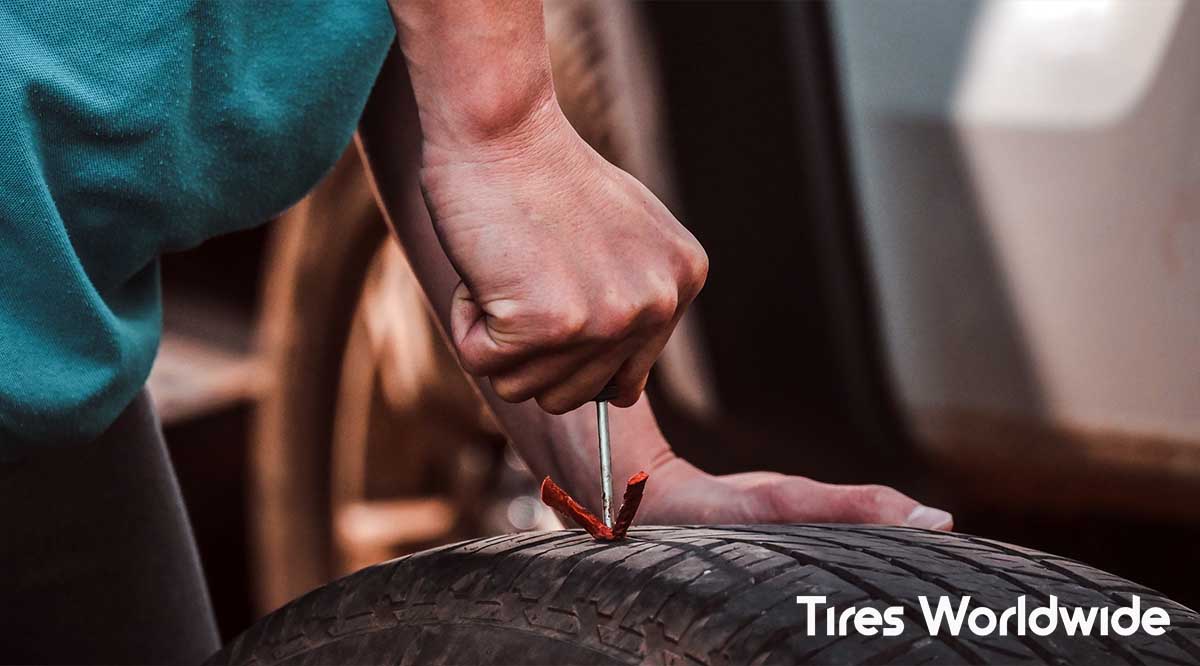
Fixing a puncture with a plug
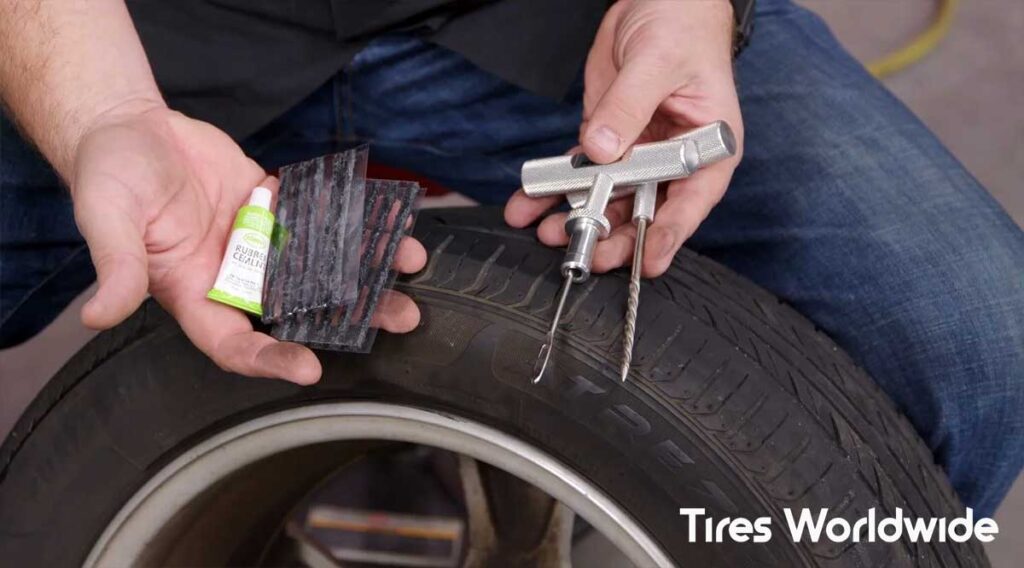
If the leak is coming from a nail or screw stuck in the tread (not the sidewall!), using a plug is usually the fastest fix. You can buy a plug kit at almost any auto store or even Walmart.
A plug kit normally comes with:
- A reamer tool
- A plugging tool
- Sticky rubber plugs
- A little glue or lube
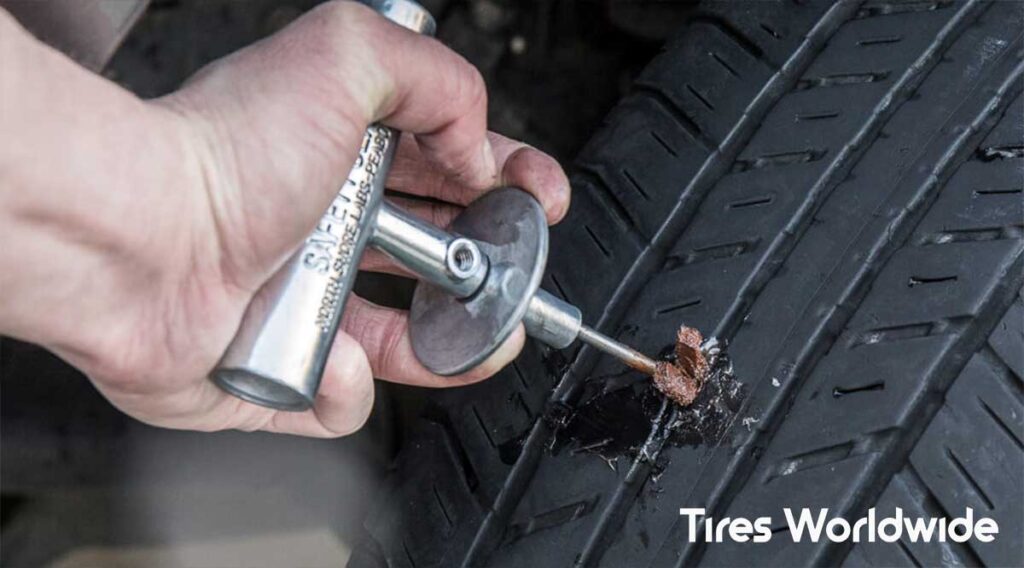
Here’s how it works:
- Pull the nail or screw out of the tire.
- Use the reamer to clean the hole and roughen it up.
- Push the sticky plug into the hole with the plugging tool.
- Trim the extra plug sticking out.
- Add air back to the tire and check for leaks again.
It sounds messy, but after you do it once, you’ll feel like a pro. Plugs are a quick fix, but they’re best for small holes right in the middle of the tread.
Using a patch for longer-lasting repairs
A patch is like the big brother of a tire plug. Instead of fixing the tire from the outside, a patch seals the leak from inside the tire. It takes a bit more work, which is why shops usually do it.
A patch repair lasts longer and is often safer than just plugging. And in many cases, the best fix is a plug-and-patch combo, which seals both the hole and the inside surface.
Here’s what the shop usually does:
- Removes the tire from the wheel
- Cleans and scuffs the inside of the tire
- Applies a special adhesive
- Installs a patch over the hole
- Heat treats it so it seals tight
If you want the strongest repair — the kind that can last the lifetime of the tire — a patch is the way to go.
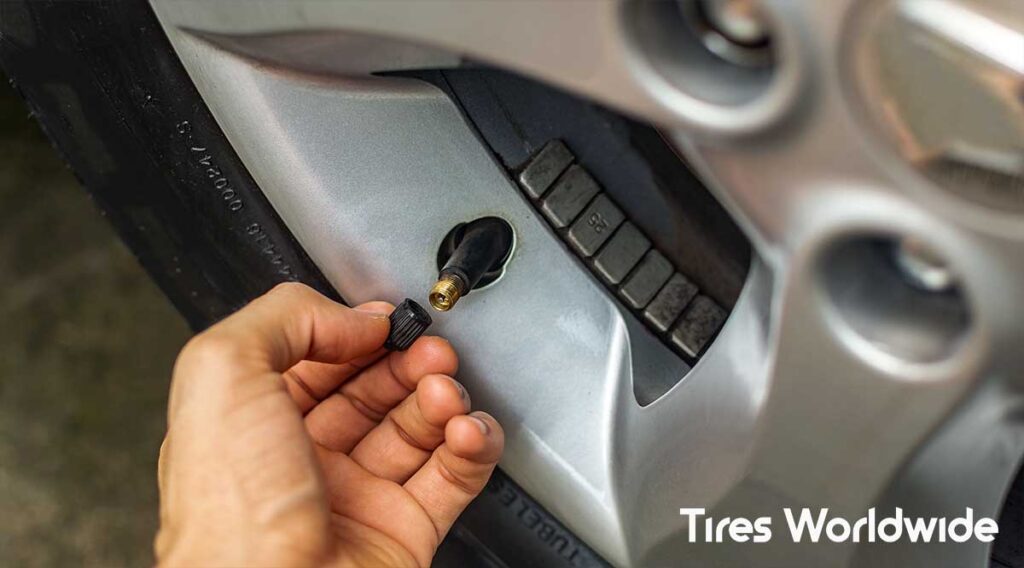
Replacing or repairing a valve stem
If your valve stem is cracked, leaking, or just old, it might need to be replaced. Valve stems don’t last forever, especially the rubber ones. Heat, cold, and sunlight break them down.
Sometimes the leak is only coming from the valve core, which is the tiny screw-like piece inside the stem. Those can loosen up. A $3 valve core tool can tighten it right up in seconds.
But when the whole stem is bad? A tire shop can replace it fast. They usually:
- Deflate the tire
- Break the bead
- Remove the old stem
- Install a new one
- Reseat and re-inflate the tire
Most shops charge very little for this, and it can save you from replacing a tire that’s otherwise perfect.
Solving bead leaks
A bead leak happens when air escapes between the tire and the rim. It’s super common in older wheels, especially ones with corrosion or peeling paint.
A shop usually fixes bead leaks by:
- Removing the tire
- Cleaning and sanding the rim’s bead area
- Applying a special bead sealer
- Reinstalling and inflating the tire
It’s not usually something you want to do at home unless you have the right equipment. But once fixed properly, the leak is gone for good.
When You Should NOT Fix a Tire Leak Yourself
So here’s the thing: most slow leaks are safe to fix at home. But not all of them. Some leaks aren’t just annoying — they’re straight-up dangerous. And trying to DIY the wrong type of tire damage can put you at serious risk, especially at highway speeds.
Let’s go through the situations where you should absolutely stop, step back, and let a professional or tire shop handle it — or replace the tire completely.
Sidewall damage or bubbles
If you see a bubble, bulge, or weird bump on the side of your tire, that tire is done. No plug, no patch, no sealant can fix that safely. The sidewall flexes a lot when you drive, especially on turns, so any repair there could fail without warning.
A blowout can happen fast and without giving you time to react, which is why shops won’t repair sidewalls at all.
These signs mean immediate replacement:
- A bubble sticking out of the side
- Deep cuts in the sidewall
- Cracks that look like spiderwebs
- A bend or impact mark from hitting a pothole
Large punctures or tears
If the hole is too big to cover with a plug or patch, the tire can’t be fixed safely. A good rule is this:
If the puncture is bigger than 1/4-inch (6mm), the tire needs to be replaced.
Also, if the damage is in a weird spot — like near the shoulder of the tire — repairs won’t hold long-term. Even if a shop could plug it, it doesn’t mean they should. Safety comes first.
Here’s what counts as unrepairable damage:
- A large nail or bolt ripped out a big chunk
- The tire split from hitting a pothole
- Cuts that go deep into the tire layers
- Damage near the edge where the tread meets the sidewall
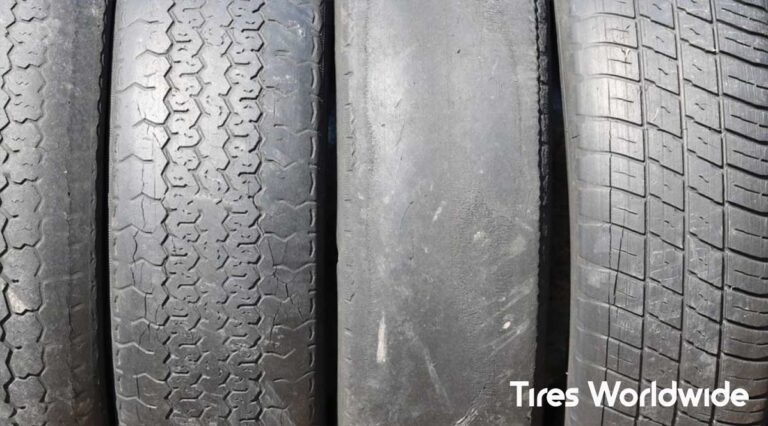
Extremely low tread depth
Sometimes the leak isn’t even the main problem. The real issue is that the tire is simply worn out. Low tread means less grip, longer stopping distance, and a higher chance of hydroplaning during rain.
If your tread is too low, fixing a slow leak won’t help much because the tire is already unsafe to drive on.
Here’s what to look for:
- Tread depth under 2/32″ (the legal minimum in many states)
- Wear bars showing across the tire
- Bald spots or uneven wear
A quick way to check? Use the penny test:
- Stick a penny into the tread with Lincoln’s head upside down
- If you can see the top of his head, the tread is too low
Prevention Tips to Stop Slow Tire Leaks from Happening Again
A slow tire leak is annoying the first time… but dealing with it again and again? No thanks. The good news is that most slow leaks can be prevented with just a little basic tire care. Nothing crazy. Nothing that takes an entire weekend. Just simple habits that keep your tires healthy and save you money (and headaches) down the road.
Let’s go through the easiest ways to stop slow leaks before they even start.
Routine tire pressure checks
This one is super simple but unbelievably effective. Just checking your tire pressure once a month can help you catch tiny leaks before they turn into big problems.
Tires naturally lose a little air over time — about 1 to 2 PSI per month — and even more when temps drop. If you ignore it, the tire gets softer, and soft tires are more likely to get damaged.
Here’s what to do:
- Check tire pressure once a month
- Check before long trips
- Check when the weather changes a lot
- Always check pressure when tires are cold
Most cars list the correct PSI on a sticker inside the driver’s door. Don’t go off the number on the tire itself — that’s the max pressure, not the recommended one.
Avoiding potholes and debris
Nobody wakes up in the morning thinking, “Let me hit every pothole today!” But sometimes they’re hard to avoid. Potholes can bend rims, pinch tires, or create tiny cracks that slowly leak air.
The same goes for broken glass, scrap metal, or random junk in the road.
A few tips that help:
- Slow down when you can’t avoid a pothole
- Don’t drive too close to the curb where debris piles up
- Keep a little more distance from cars ahead so you can spot hazards early
- Avoid driving through construction zones when possible
Hitting a pothole at high speed is one of the fastest ways to get a bead leak or internal tire damage.
Regular tire rotations and inspections
Most people don’t think about tire rotations, but they’re more important than you’d expect. When the tires wear evenly, they’re less likely to develop cracks, bald spots, or weak areas that leak air.
Most shops recommend rotating tires every 5,000 to 7,500 miles. It takes about 20 minutes, and it helps tires last longer.
During a rotation, a tech usually:
- Checks the tread
- Looks for punctures
- Examines the sidewalls
- Checks the valve stems
- Spots early signs of leaks
Basically, they find the problem before it becomes a real problem.
Keeping wheels clean and rust-free
You might not think about cleaning your wheels, but believe it or not, dirty or rusty wheels are one of the top causes of bead leaks. When corrosion forms around the rim, the tire can’t seal properly, and air sneaks out slowly.
This is especially common if you live somewhere with cold winters, salted roads, or near the ocean.
Tips to keep wheels clean and sealed:
- Wash your wheels regularly
- Remove brake dust buildup
- Dry the wheels well after washing
- Wax or ceramic-coat them to fight corrosion
- Fix wheel scrapes before they get worse
When the rim stays clean and smooth, your tire stays sealed and airtight.
Conclusion
Slow tire leaks are annoying, but the good news is—they’re totally fixable once you know what you’re dealing with! Whether it’s a tiny nail, a cracked valve stem, or a worn-out bead seal, you now have the steps to find it, fix it, and prevent it from coming back. Stay on top of your tire pressure, get regular inspections, and don’t ignore the signs. Your tires will last longer, your gas mileage will improve, and you’ll feel way safer on the road.
Let’s keep your ride rolling smoothly!