Tire Inspection Checklist
Ever heard the saying, “Your tires are the only part of your car that actually touches the road”? It’s true — and a little scary! Your tires control your stopping power, traction, fuel use, and even ride comfort. That’s why having a simple tire inspection checklist makes life so much easier.
In this guide, I’ll walk you through the exact steps I use when checking my own tires at home. No fancy tools, no confusing jargon — just real, easy-to-follow steps. By the end, you’ll know how to spot problems early, stay safer on the road, and maybe even save money by catching issues before they turn into expensive repairs!
Why Tire Inspections Matter
They Keep You Safe on the Road
Your tires are the only part of your car that actually touches the road. Kind of wild when you think about it, right?
That tiny patch of rubber is what helps you stop, turn, and stay in control.
When your tires are worn down, low on air, or damaged, your car can’t grip the road the way it should. This means longer stopping distances and less control during rain or bad weather.
Even a small issue can turn into a big deal fast.
They Help Your Tires Last Longer
Tires aren’t cheap. And the annoying part? Most people replace them way earlier than they need to.
Not because they’re worn out — but because something small was ignored.
A simple tire check can catch things like uneven wear, low pressure, or tiny cracks before they get worse.
Fixing these early can easily add months (sometimes years!) to your tire’s life.
Think of it like brushing your teeth. Quick checks = fewer surprises later.
They Save You Money on Gas
This one always surprises people. Driving with low tire pressure makes your engine work harder.
More work = more gas burned.
By keeping your tires at the right pressure, you can get better fuel mileage without doing anything else.
The U.S. Department of Energy even says proper tire pressure can improve gas mileage by up to 3%. It might sound small, but if you drive often, that 3% adds up fast!
They Help You Spot Problems Early
Tires tell stories. If one looks different from the others, it usually means something else is going on.
Uneven wear might mean your alignment is off.
Bald spots can point to suspension issues.
Vibrations might be a sign of a bent wheel.
Catching these early saves you from expensive repairs later. It’s like your car whispering, “Hey… something feels off.”
You just have to listen.
They Make Long Trips Way Less Stressful
Nothing ruins a road trip like a flat tire in the middle of nowhere.
A quick check before a long drive gives you confidence. You know your tires are ready.
It’s such a small thing, but it can save you hours of stress, towing bills, or even dangerous situations on the highway.
Plus, it just feels good knowing your car is ready to go.
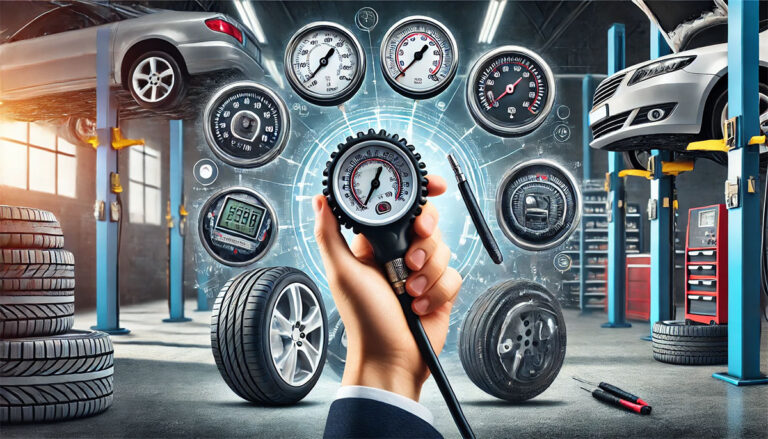
Tools You Need for a Quick Tire Check
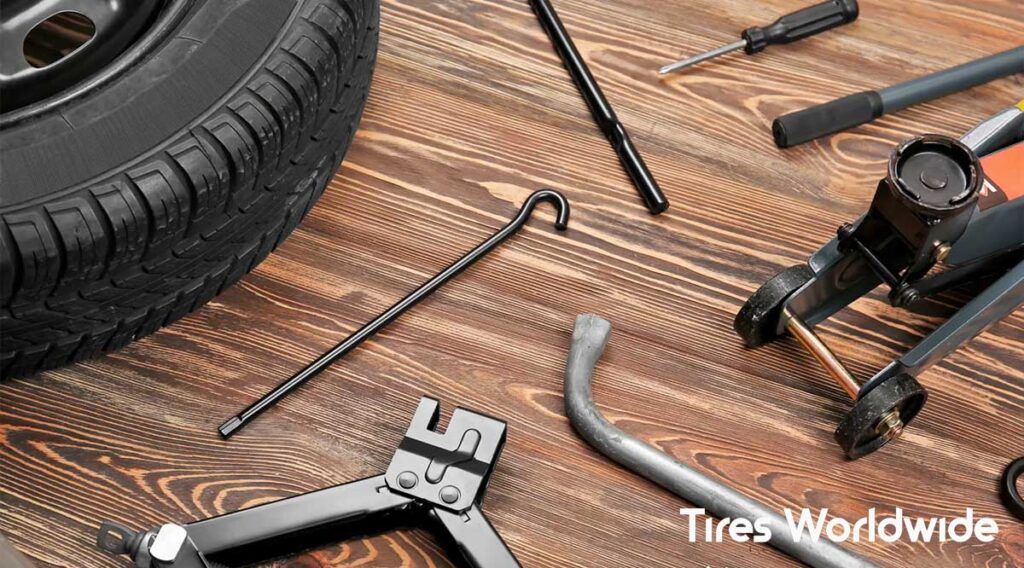
Simple Tools You Can Use at Home
You don’t need a bunch of fancy gear to check your tires. Seriously — most people already have what they need.
The basics are super simple:
- A tire pressure gauge
- A penny
- A small flashlight
That’s it!
These little tools help you spot problems fast without feeling like you’re doing real “car work.”
A digital gauge is easier to read, but a cheap one from the gas station will still get the job done.
And the penny? It’s the easiest way to check your tire tread without buying anything extra.
Optional Tools for More Accurate Checks
If you want to level up your tire-checking game, there are a few extra tools that make things even easier.
Here are some helpful “bonus” tools:
- A tread depth gauge
- A tire inflator or small air pump
- A portable light
- A valve stem cap set
None of these are required, but they make your checks faster and a little more accurate.
A tread depth gauge gives you exact numbers, and they usually cost less than $5, so it’s not a major investment.
How to Use Each Tool the Right Way
Let’s break this down so it’s simple and stress-free.
Tire Pressure Gauge:
Press it firmly onto the valve stem.
You’ll hear a quick “psst” of air — that’s normal.
Then read the number and compare it to your car’s recommended PSI (usually on a sticker inside the driver’s door).
Penny Test:
Stick the penny into the tire tread with Lincoln’s head upside down.
If you can see the top of his head, it’s time to replace your tires.
Flashlight:
Use it to get a clear look at the tread and the sidewalls.
Little cracks or bumps are easier to spot when the light hits just right.
Once you’ve used these a few times, the whole process becomes super quick.
Checking all four tires usually takes less than two minutes — no joke!
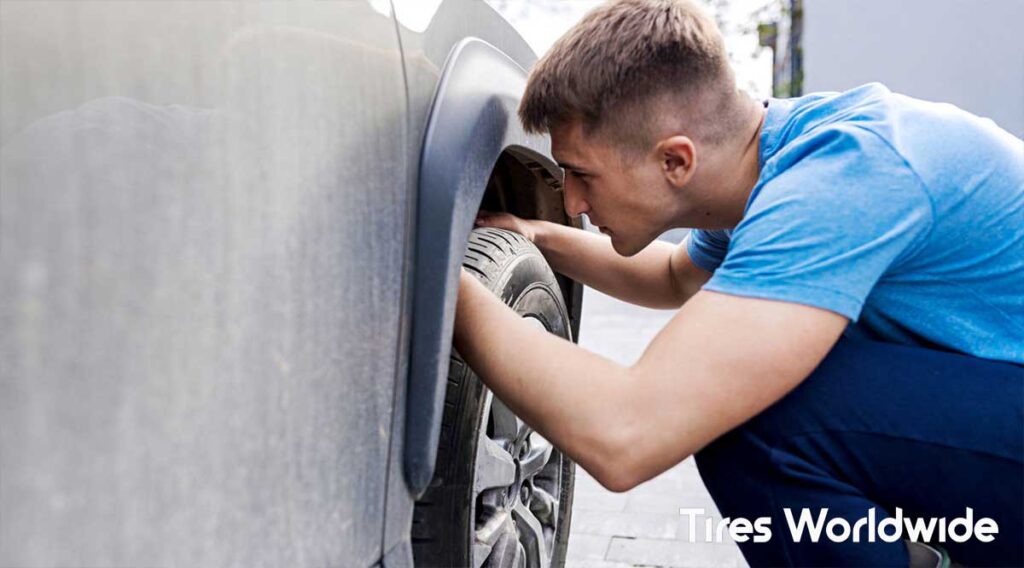
Step-by-Step Tire Inspection Checklist
Start With Your Tire Pressure
Let’s kick things off with the easiest step.
Checking your tire pressure takes less than a minute, and it makes a huge difference in how your car drives.
Grab your tire gauge and check each tire one by one.
Compare the numbers to the PSI listed on the sticker inside your driver’s door.
If the number is too low, add air.
If it’s too high, release a little.
Getting this right can help your tires last longer and save you money on gas!
Measure Your Tread Depth
Next, look at how worn your tires are.
Your tread helps your car grip the road, especially in rain.
Do the penny test by placing a penny into the tread with Lincoln’s head upside down.
If you can see the top of his head, that tire is worn out and needs replacing soon.
If you have a tread depth gauge, that’s even better.
But honestly, the penny test works great for most people.
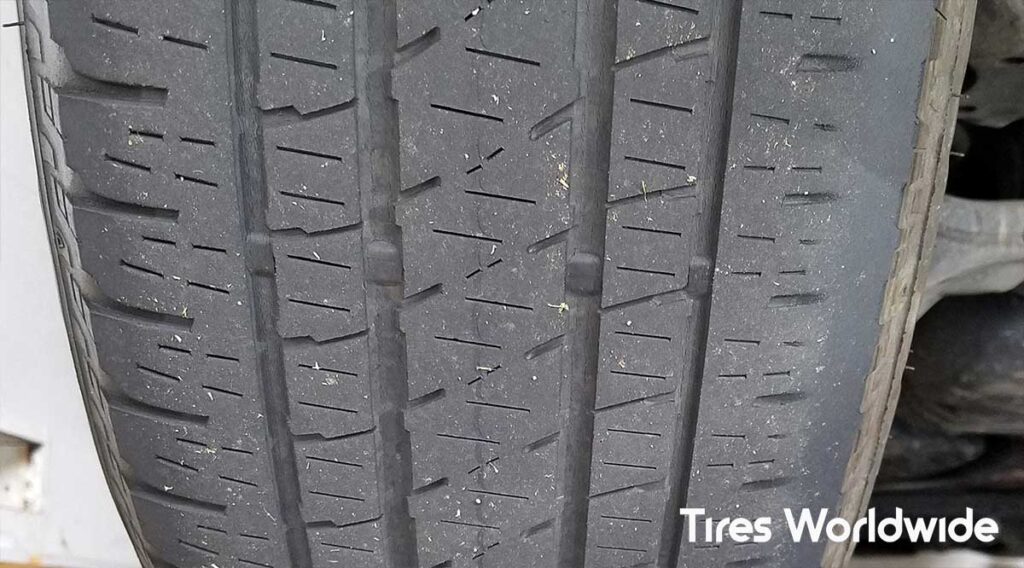
Look for Cracks, Bulges, or Cuts
Now it’s time to do a quick “health check” on your tires.
Use your flashlight and look closely at the tread and sidewalls.
You’re looking for:
- Cracks
- Cuts
- Bubbles
- Weird bumps
- Anything that just doesn’t look right
A bulge usually means the inside of the tire is damaged.
That’s not something you can ignore — it’s dangerous and needs attention ASAP.
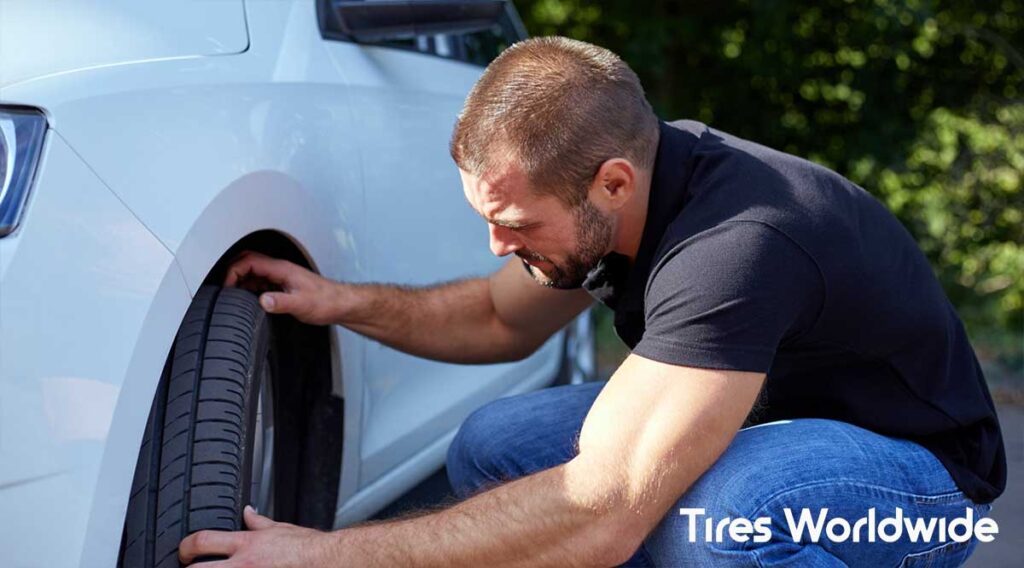
Inspect the Tire Sidewalls
The sidewall is the smooth part of your tire, and it’s easier to damage than people think.
Look for deep scratches, small cuts, or dry-looking cracks.
Sidewall damage can get worse quickly, especially during hot weather or long drives.
So if anything looks suspicious, make a note of it.
Check the Valve Stems
These little parts often get ignored, but they’re the reason your tires stay filled with air.
Look for:
- Cracked rubber
- Loose caps
- Air leaks
A damaged valve stem can cause slow leaks, which can lead to low pressure and uneven tire wear.
Luckily, valve stems are cheap and easy to replace at any tire shop.
Look for Signs of Uneven Wear
Finally, take a step back and compare all four tires.
Do they look the same?
Or is one wearing out faster than the others?
Uneven wear usually means something else is going on — like alignment issues or suspension problems.
It’s one of the biggest clues your car gives you when something needs attention.
After you’ve checked all of this, you’ll have a clear idea of whether your tires are safe or if something needs fixing.
How to Check Tire Pressure Correctly
Find Your Recommended PSI First
Before you even touch a tire gauge, you need to know the right PSI for your car.
Good news — it’s super easy to find!
Open your driver’s side door and look for a little sticker on the frame.
That sticker tells you the exact PSI your front and rear tires should be.
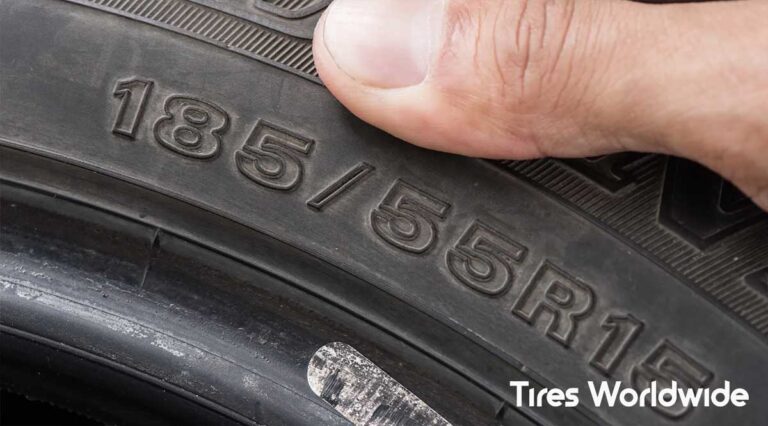
Don’t use the number printed on the tire itself.
That number is the maximum pressure the tire can hold, not the pressure your car needs.
Big difference!
If you want to double-check, here’s a helpful official guide from NHTSA:
https://www.nhtsa.gov/equipment/tires
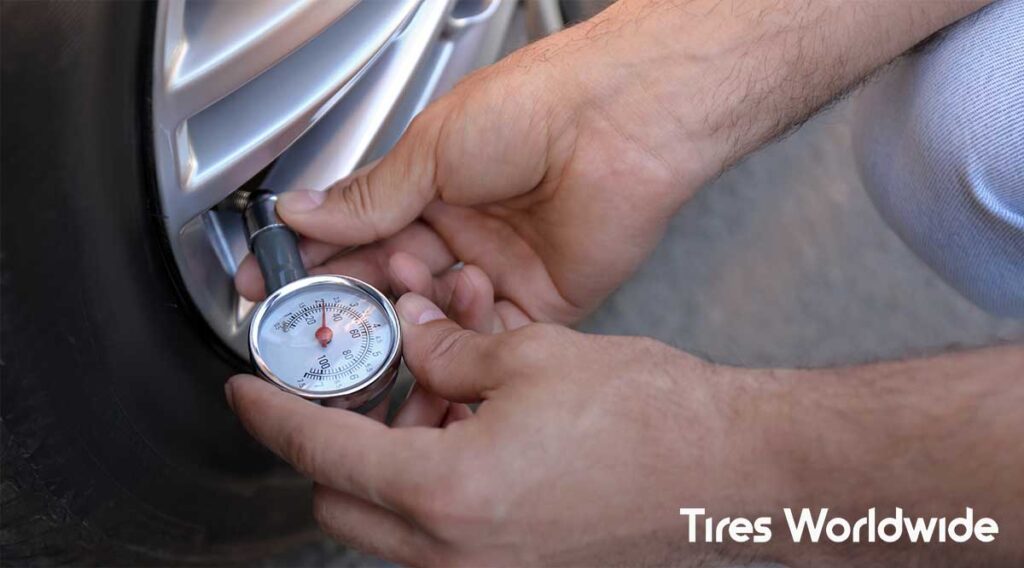
How to Use a Tire Pressure Gauge
Using a tire gauge is simple once you get the hang of it.
Here’s all you need to do:
- Remove the valve stem cap.
- Press the gauge straight onto the valve.
- Hold it firmly so no air escapes.
- Read the PSI number on the screen or dial.
You might hear a quick “pssst” sound — that’s totally normal.
Just make sure the gauge sits flat so you get an accurate reading.
If you’re using a digital gauge, it shows the number right away.
If you’re using a stick gauge, the little rod pops out with the PSI reading.
The Best Time to Check Your Tire Pressure
Tire pressure changes with temperature.
That’s why timing matters.
Always check your tires when they’re “cold.”
This means the car hasn’t been driven for at least 3 hours.
If you’ve been driving around, the air inside your tires warms up and expands, which gives a higher reading.
Morning is usually the best time to check pressure.
The reading will be more accurate and easier to fix before heading out.
Signs Your Tire Pressure Is Too Low
Underinflated tires cause all kinds of problems.
Here are some common signs:
- Your steering feels heavy
- The tire looks “squished” at the bottom
- Your car uses more gas
- The edges of the tire wear out faster
Low air pressure makes your tires heat up faster too, which can be dangerous on long drives.
Signs Your Tire Pressure Is Too High
Too much air is just as bad.
When your tires are overinflated, they become stiff and don’t grip the road as well.
Signs of high pressure include:
- Bumpy or harsh rides
- The center of the tire wearing out first
- Less traction, especially when turning
You want your tires firm — not rock-hard.
Keeping your PSI right where your car needs it gives you better traction, smoother rides, and better gas mileage.
It’s one of the easiest ways to make your car feel brand new again.
How to Measure Tire Tread Depth

Use the Penny Test for a Quick Check
Let’s start with the easiest method on the planet — the penny test.
It takes five seconds and a single penny.
Here’s what to do:
- Grab a penny.
- Put it into the tire tread with Lincoln’s head upside down.
- Look at how much of his head you can see.
If you can see the very top of his head, your tread is too low.
That means the tire won’t grip the road well, especially in the rain.
Time for a replacement.
If part of his head is still covered, you’re good for now, but keep checking each month.
This method isn’t fancy, but it’s accurate enough for everyday drivers.
Use a Tread Depth Gauge for Exact Numbers
If you want something a little more precise (and still super cheap), grab a tread depth gauge.
They usually cost a few dollars online or in auto parts stores.
Just place the gauge into the groove and push down until it stops.
The gauge tells you the exact measurement, normally in 32nds of an inch.
Here’s the rule of thumb:
- 4/32″ — Start planning for new tires
- 3/32″ — Grip is getting weak
- 2/32″ — Legally worn out in most states (replace ASAP)
Know the Legal Tread Limits
Most places in the U.S. require at least 2/32″ of tread.
Anything below that is considered unsafe.
Driving on bald tires is dangerous because your car can lose traction, hydroplane in the rain, or take way longer to stop.
Even if the tire still “looks okay,” worn tread is a huge risk.
Understand How Worn Tread Affects Your Safety
Tread depth impacts everything:
- How fast you can stop
- How well you handle turns
- How your car grips wet roads
- How your car handles snow or ice
Once tread gets low, your tire channels less water away, which means your car can slide more easily.
Think of it like trying to walk on smooth shoes during a storm.
Not fun… and not safe.
When to Replace Your Tires
Replace your tires if:
- The penny test fails
- Your tread is under 2/32″
- You notice bald patches
- Your tread wears unevenly
- Your tires feel slippery on wet roads
It’s always better to replace a little early than too late.
Plus, new tires feel amazing — quieter, smoother, safer, all that good stuff.
Spotting Dangerous Tire Damage
Watch for Cracks and Dry Rot
Tires age just like anything else.
Over time, the rubber can dry out and start cracking.
These cracks—often called “dry rot”—can show up on the tread or the sidewalls.
They may look small, but they’re a huge warning sign.
Dry rot usually happens when tires sit in the sun too long, don’t get driven often, or are older than 5–6 years.
If you see cracks that look deep or spread out across the tire, it’s time to replace them.
Look for Bulges and Bubbles
This is one of the most dangerous types of tire damage.
Bulges or bubbles happen when the inside of the tire gets damaged and air pushes out toward the surface.
It usually shows up as a round bubble on the sidewall.
You can feel it with your hand if you run it along the side of the tire.
If you ever spot a bulge, don’t drive on the tire.
Seriously, not even to run to the store.
A bulge means the tire can blow out at any moment, especially at higher speeds.
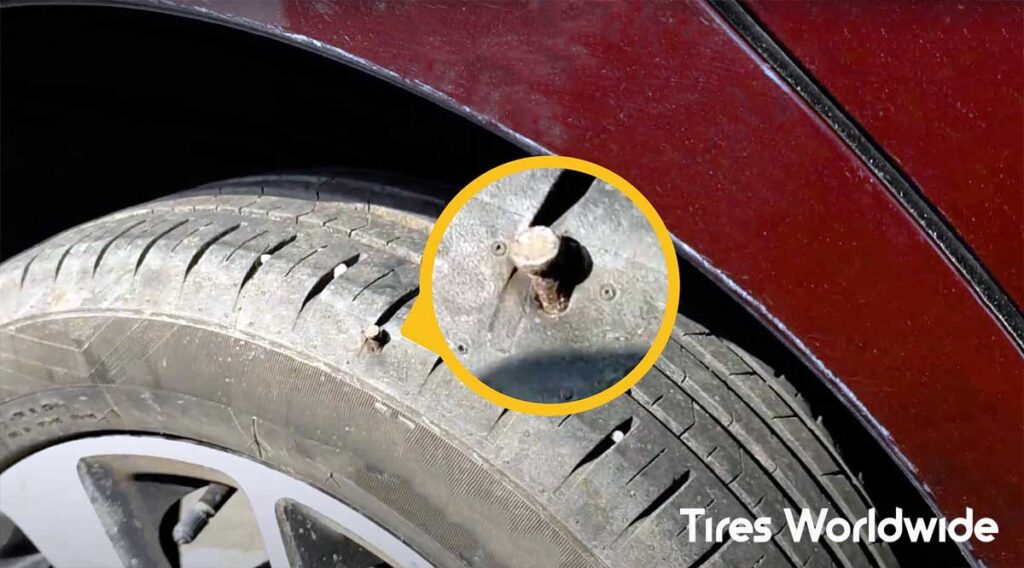
Check for Nails and Punctures
Nails, screws, or sharp objects love tires.
It happens to everyone at some point.
If you see something stuck in your tire, don’t pull it out unless you’re already at a tire shop.
Removing it can make the air leak faster.
Some punctures can be patched safely, especially if they’re in the tread.
But damage on the sidewall can’t be repaired — that always means buying a new tire.
Watch for Cuts on the Tread or Sidewall
Cuts happen when you hit something sharp or scrape against a curb.
Small, shallow cuts are usually not a big deal.
But if you see deep cuts that reach the cords or fabric inside the tire, that’s unsafe.
Sidewall cuts are especially risky because the sidewall flexes a lot when driving.
A weak spot there can lead to a blowout.
Damage That Means Immediate Replacement
Some tire problems can wait a bit.
Others need action right now.
Here’s what needs immediate replacement:
- Bulges or bubbles
- Deep sidewall cuts
- Large cracks or dry rot
- Exposed cords
- Big punctures near the edge of the tread
- Tires older than 6 years (even if they “look fine”)
If you notice any of these, don’t wait.
A bad tire can fail without warning, and it’s just not worth the risk.
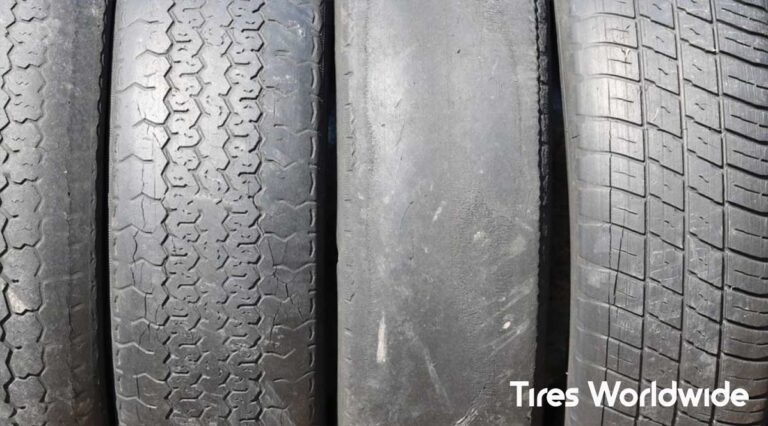
Identifying Uneven Tire Wear
What Uneven Wear Patterns Tell You
Your tires wear down over time, but how they wear can reveal a lot.
Uneven wear isn’t random. It’s actually your car trying to tell you, “Hey… something’s off.”
When one part of the tire wears faster than another, it’s usually a sign of another problem — like alignment issues, balance problems, or worn suspension parts.
So don’t ignore it. Uneven wear is one of the biggest clues that something deeper needs attention.
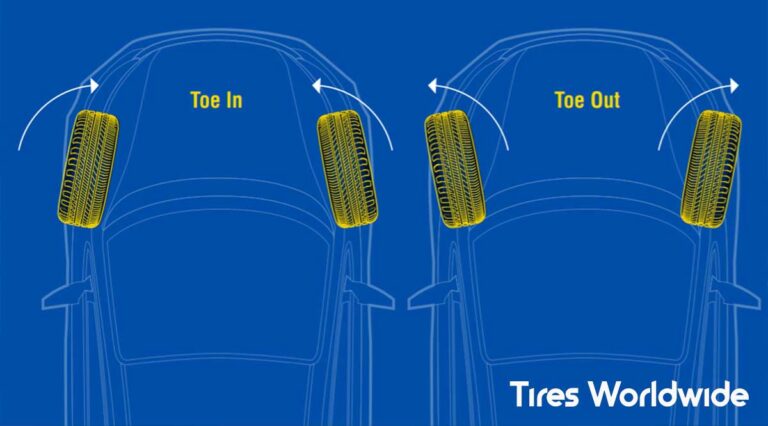
Wear on the Inside or Outside Edges
Take a close look at the edges of your tires.
Are the inner or outer edges wearing faster than the middle?
If the inside edge is worn down, it often means your wheels have too much negative camber — but don’t worry about the fancy terms.
It basically means the wheels are tilting slightly inward.
If the outside edge is wearing more, your wheels might be tilted outward.
Both of these situations usually mean you need an alignment.
Driving with bad alignment isn’t just annoying — it can wear out a tire in months instead of years.
Feathering and What It Means
Feathering looks like the tread blocks are sharp on one side and smooth on the other.
It’s caused by the wheels not being aligned straight, which makes the tire scrape against the road at an angle.
This often happens when the toe setting of your alignment is off.
You might also feel your car pull slightly to one side when driving.
If you spot feathering, schedule an alignment check soon.
Cupping and Why It Happens
Cupping looks like small dips or “cups” worn into the tread.
It almost looks like someone scooped out little chunks of rubber.
This usually means your suspension isn’t absorbing bumps correctly.
Shocks or struts might be worn out, causing the tire to bounce on the road instead of staying planted.
Cupping often leads to vibrations at higher speeds, so you’ll feel it in the steering wheel or the whole car.
Flat Spots on the Tire
Flat spots are patches where the tire wears down more than the rest of the tread.
This can happen if you slam on the brakes and your tires lock up.
It can also happen if your car sits parked for a long time without moving.
When you drive again, the tire might feel bumpy at first until it warms up — but sometimes the flat spot stays.
Small flat spots can smooth out over time, but big ones usually mean the tire needs replacement.
When Uneven Wear Means It’s Time for a Pro
If you notice any uneven wear pattern — edges, feathering, cupping, or flat spots — it’s smart to get your car checked by a mechanic or tire shop.
These signs usually point to problems you can’t fix at home.
A professional can check your:
- Alignment
- Suspension
- Tire balance
- Tire rotation pattern
Fixing the problem early can save your tires and help your car drive smoother and safer.
When to Bring Your Car to a Mechanic

Problems You Can Fix Yourself vs. What Needs a Pro
Doing your own tire checks is great, and most of the steps are simple.
But sometimes you’ll find something that’s better handled by a professional.
You can usually fix small things yourself, like adding air, tightening a valve cap, or checking tread.
But deeper problems—like uneven wear, leaks, or strange vibrations—need someone with tools and experience.
A mechanic can tell you exactly what’s going on and prevent small issues from becoming expensive repairs.
When Tire Damage Needs a Professional Fix
Some problems look small but can be dangerous if you ignore them.
Here are signs you should take your car in:
- Bulges or bubbles in the tire
- Deep cracks or dry rot
- Punctures near the edge of the tread
- Slow leaks you can’t find
- A nail or screw stuck in the tire
- Cuts on the sidewall
A pro can check whether the tire can be safely repaired or if it needs to be replaced.
Sidewall damage, for example, can’t be patched — that’s always a replacement.
When You Need a Wheel Alignment
If your tires are wearing unevenly, your steering feels off, or your car pulls to one side, you likely need an alignment.
Alignments require special equipment to adjust your wheels so they sit at the right angle.
A good alignment can:
- Make your tires last longer
- Improve fuel economy
- Give you a smoother ride
- Help your car stay straight on the road
If you spot unusual wear patterns, don’t wait. An alignment is cheaper than replacing all four tires.
Why Tire Rotation Matters
Even if your tires look fine, rotating them is one of the easiest ways to extend their life.
Front tires usually wear out faster because they handle steering and more of the braking force.
Rotating them every 5,000 to 7,500 miles helps everything wear evenly.
You can check your car’s manual for the exact schedule.
Most shops include tire rotation during oil changes, so it’s fast and affordable.
Red Flags That Require Immediate Attention
Here are signs you should take your car in right away:
- Your steering wheel shakes at certain speeds
- Your car vibrates more than usual
- You hear loud thumping or flapping sounds
- Your car pulls hard to one side
- You have to keep correcting the steering
- Your tire keeps losing air
- The tread is almost gone
These issues can be dangerous if you keep driving.
A quick visit to a mechanic can prevent a breakdown or even an accident.
Peace of Mind Comes From Getting It Checked
Even if something feels “kinda off,” it’s worth letting a professional take a look.
Mechanics see this stuff every day, and a small adjustment can make your car feel brand new again.
Think of it this way: checking your tires at home keeps you ahead… and checking with a mechanic keeps you safe.
How Often Should You Inspect Your Tires?
Do a Quick Check Every Month
Most people forget about their tires until something goes wrong.
But checking them once a month can prevent so many problems.
A quick monthly tire check helps you:
- Catch low tire pressure
- Spot any new damage
- Notice uneven wear early
- Make sure your tread is still safe
It honestly takes less than two minutes.
Just walk around your car, look at each tire, and check the pressure.
Easy win for your safety and your wallet.
Seasonal Tire Inspections Are Important
Tires behave differently depending on the season.
Hot weather, cold weather, rain, and snow all change how your tires perform.
When the seasons change, do a deeper inspection.
Look for signs of cracking, worn tread, or anything that seems “off.”
If you live in an area with really cold winters or super-hot summers, this is even more important.
Extreme temperatures can mess with tire pressure fast.
Do a Check Before Long Road Trips
Anytime you’re heading out on a long drive, check your tires first.
Road trips put extra stress on tires, especially at high speeds or on rough roads.
Make sure to:
- Check tire pressure
- Look for cracks or bulges
- Measure your tread
- Make sure the valve caps are tight
A quick check can save you from dealing with a flat tire in the middle of nowhere.
Trust me — it’s worth the extra minute.
How Weather Affects Tire Performance
Tire pressure drops when it’s cold and rises when it’s hot.
This means the same tire can have different PSI levels from morning to afternoon.
In the winter, tires lose pressure faster, which can make your car handle poorly.
In the summer, overinflated tires can become stiff and lose traction.
Because weather affects your pressure so much, it’s smart to check your PSI a little more often during extreme temps.
When Should You Replace Your Tires Completely?
Even with perfect checks, tires don’t last forever.
Most tires need replacing every 5–6 years, even if the tread still looks okay.
Replace your tires if you notice:
- Tread below 2/32″
- Bulges or bubbles
- Deep cracks or dry rot
- Uneven wear you can’t fix
- Constant air leaks
- Loud thumping or vibration
Regular inspections help you know exactly when it’s time to replace them — no guessing involved.
Consistency Helps You Stay Safe
Checking your tires often doesn’t take long, and it keeps you ahead of problems.
Think of it like brushing your teeth — it’s small, but it prevents big issues later.
A few minutes a month keeps your car safer, smoother, and way more reliable.
Conclusion
Keeping your tires in great shape doesn’t have to be stressful. With this simple tire inspection checklist, you’ll catch problems early, drive safer, and save money over time. Just stick to quick monthly checks, watch for unusual wear, and never ignore strange vibrations or noises.
You got this — safer driving starts right at your wheels!